Thursday, December 31, 2009

Why I Love Craigslist

A few days ago I was bored at work during my lunch break. I hadn't checked Craigslist in a while so I decided to check out the free stuff people were giving away. I hit the jackpot! I found a wonderful old man that had just retired and was cleaning out his basement to make room for his ceramics studio. Guess what he was giving away? ALL of his wife's old canning stuff!!!

Check it out!
I walked away with 28 wide mouth quart jars, 4 pint jars, and 3 half gallon jars (one of the half gallon jars was a wide mouth!).... I had to stop at Walmart on my way home to get these little crates that conveniently held a dozen quart jars each. The nice man just seemed to want all the stuff out of his basement and he also handed me a bag with random canning stuff. Check out the vintage items. I might keep them around just for giggles :)

Neat old spices :)

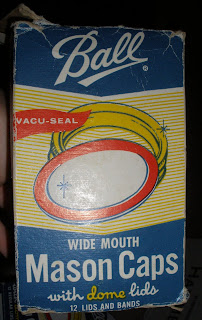
I know these lids aren't vintage but they are typically pricey. Plus they were still in the original packaging so I think they are brand new :)

I was half-tempted to send these forms in to see if they'd send me a book...

Jar Rubbers - I giggled when I read that :)

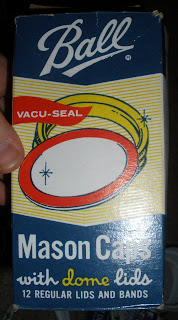
These lids aren't so vintage but they are almost a decade old.


So I am completely ecstatic about this. I thought I was going to have to BUY a bunch of the wide mouth mason jars so I saved a TON of money. If you haven't heard of Craigslist, check it out. Just click on the city nearest you to start finding stuff. People are giving stuff away everyday. If its not free, it's usually pretty cheap :)

Happy New Year everyone!


Wednesday, December 23, 2009

Sewing Machine


I splurged and finally bought a sewing machine - a Singer 7467 !! I went to JoAnne's thinking I was going to get a cheapo model that I could learn on, but after talking to the experts there, I got a $200 model that was discounted down from almost $400! It's a good thing I got it before Christmas :) Now all of my gifts are sewing/craft related!

I'll have pics of the first craft I made later :)

Wednesday, November 25, 2009

Lotion Bars and Lip Balm

Sorry I haven't been around guys. School and work got the best of me. But I'm back and with lots of pictures!!

BTW!! My kitchen is a freaking mess! Despite the mess, my hands are so freaking soft I may never go back to regular lotion.

Here are the results of my lotion bar experiment. Luckily my little sister was here to help :) See how pumped she was about the lotion bars!!

Lotion Bars
1 part vegetable shortening
1 part vegetable oil
1 part beeswax

Here my sister is providing a close up of the CUTEST MOLD EVER!!! Horray for penguins :)

Here is the total batch of the lotion bars. A bunch went to my sisters and some to other people.

~~~~~~~~~~~~~~~~~~~~~~~~~~~~~~~~~~~~~~~~~~~~~~~~~~~~~~~~

Lip Balm
3 tablespoons vegetable oil
2 tablespoons vegetable shortening
1 tablespoons beeswax

Here, the little pots and tins are cooling. The lip balm sets fairly quickly.

Here is the stack of the completed lip balms. I sent a bunch home with my sisters and I still have a ton left over...

Overall, the experiment was a huge success. The lotion bars are incredible! And my elbows are grateful. They stayed together without any issue. They are a little oily at first but it rubs into your skin and then it's wonderful. The lip balms are pretty good too. They got a little hard but they work pretty well. I just rub it between my palms for a few seconds and then its good to go. I love stuff that I use that I know the ingredients of :)

Happy Winter everyone!


PS: In case anyone is wondering... I got the beeswax off of Amazon and the molds/tins from The Chemistry Store. Also, I was considering maybe having a giveaway for a lotion bar and lip balm... would anyone want them??

Saturday, October 31, 2009

Uses for Canning Jar Rings

I got this idea from Ms. Catalina.

Grease the inside of a wide mouth canning ring (PAM or butter works). Heat pan to medium heat. Place ring onto pan and crack an egg into it. Flip when egg looks firm.

Place on toasted english muffins.


Yummy :) I love dippy eggs!

Freezing Zucchini

I LOVE ZUCCHINI!! Thank goodness it freezes well ^_^
Here is the zucchini that I shredded up from last time I went to the downtown farmers market.

Rinse the zucchini to get off any dirt. Then shred them into a giant bowl.... or bowl+plate...


Then get out the plastic wrap cut off about a square. Scoop the zucchini out into 1 cup portions. Make sure you pack it in the measuring cup because it will lose moisture over time.


Then fold the plastic wrap over making little zucchini pillows. Make sure you get out as much air as you can. As you can see I got 14 cups of shredded zucchini :)

Then throw them in a giant freezer bag (or 2) and use when needed. Again, make sure you get out as much air as you can.

Easy Peasy :)

Also, if you have any bits that you had to peel or cut off, throw them in a bag and put it in the freezer. Whenever I have leftover veggie bits (zucchini, carrots, celery...), I freeze them until I have enough to make veggie broth. It's soooo very yummy :)

Cheers!

Sunday, October 25, 2009

Upcoming Crafts...

My sister will be back from college for Thanksgiving next month so I thought getting her and my other sister together to do a craft would be fun. Here's what I have planned...


Stay tuned for the results :)

Thursday, October 22, 2009

Make-A-Mix Chocolate Chip Cookies (revisited)

I like making things in large batches so that I can freeze/store them away for later (who doesn't?). Well I think that the freezer cookie dough is wonderful but with the recent salmonella scares, it definitely not worth it. In an older post I mentioned this book I got from my BF's mom called Make-A-Mix: 306 recipes to save time and money. I LOVE this book!!

I wanted to make chocolate chip cookies to take to my BFF for her birthday so I made this recipe and made extras. Originally, the book says to roll the extra dough into logs to slice. Well since I have to be different I tried making my own freezer cookie dough ball packages.

Place extra dough balls made with a medium cookie scoop on wax paper and place in the freezer to harden. Then, transfer to sandwich baggies. I got 12 dough balls in 1 standard size Ziplock sandwich baggie ^_^ The total recipe made about 6.5 dozen cookies. I froze 4.5 dozen shown below. My BF likes to eat the dough raw anyway so he likes the easy access :)


Refer to this post for the recipe ^_^ Now if I want to bake cookies I can just pull out a baggie, separate the dough balls and toss them onto a cookie sheet. I like being lazy :)


Saturday, October 17, 2009

Cranberry Walnut Zucchini Bread

OMG I found the greatest zucchini bread recipe. Even my kitty Shinobi was interested :) I modified it a little from Deb's recipe at Smitten Kitchen (I love her site!!). Here it is:

Cranberry Walnut Zucchini Bread

3 eggs
1/2 cup vegetable oil
1/2 cup apple sauce
1 cups sugar
2 cups grated zucchini
3 teaspoons vanilla extract
2 cups all-purpose flour
1 cup wheat flour
3 teaspoons cinnamon
1/8 teaspoon nutmeg
1 teaspoon baking soda
1/2 teaspoon baking powder
1 teaspoon salt
1/2 cup chopped walnuts
1 cup dried cranberries

Preheat oven to 350°F.
Grease two 8×4 inch loaf pans, 24 muffin cups or one 8x4 inch loaf pan and 4 mini loaf pans. In a large bowl, beat the eggs with a whisk. Mix in oil and sugar, then zucchini and vanilla. Combine flour, cinnamon, nutmeg, baking soda, baking powder and salt, as well as nuts and cranberries. Stir this into the egg mixture. Divide the batter into prepared pans. Bake loaves for 60 minutes, plus or minus ten, or until a tester inserted into the center comes out clean. Muffins and mini loaves will bake faster, about 20 to 25 minutes.

This makes your home smell heavenly ^_^ This is definitely a keeper.

Here are some other changes that I want to try:

* use 2 egg whites and 2 mashed bananas
* use an 8 oz. can of crushed pineapple and some cut up maraschino cherries

Thanks Deb!!

Cheers ^_^

Apple Chips

Apple chips are super easy to make and make your home smell yummy.

Peel (optional), core and slice apples into thin wedges. Soak in lemon water for about 10 minutes. Then sprinkle with cinnamon/nutmeg/brown sugar (or not) and bake at the lowest setting for about 6 to 8 hours (rotate periodically) with the oven cracked open. Don't bake over 200 degrees otherwise the slices won't dehydrate properly. I ended up putting mine in the toaster oven for another hour to make sure they got nice and dry. If you have a dehydrator.... lucky you. Using a dehydrator is easier than oven drying :) Here's the final product....

Put them in an airtight container and they keep for about a year. You can also rehydrate them to use in baking if needed.... They are also yummy snacks to throw in lunch boxes.

Cheers ^_^

Mini Chicken Pot Pie!!

My BF liked the chicken pot pie I made a while ago (that I made a double batch of and stuck one in the freezer) so much that he asked me to make one for his dad. Well after I made the full sized pot pie for his dad, I had leftover dough bits and pot pit filling. I remembered that my BFs mom gave a free mini pie maker like the one below.....
... so I naturally had to make a mini chicken pot pie. IT WAS THE CUTEST THING EVER!!

Here is the tiny pot pit on top of the full sized one ^_^ It's so adorable. I ended up throwing it in the freezer and taking it to work for part of lunch the next day. It reheated wonderfully and the crust was still flaky and AWESOME!!! I will totally be making more of these to throw in the freezer.

This has been your daily dose of cute food ^_^


Friday, October 16, 2009

UGH..........

Sorry I've been MIA... School and work and life took over.

I'll soon be posting pics of:
  • a mini chicken pot pie I made with my (free!) mini-pie maker
  • apple chips
  • homemade Halloween cookies - sugar cookies, chocolate sugar cookies, pumpkin cookies
  • mini zucchini loaves
I'll be making another trip or two to the farmer's markets in the area to stock up on some stuff so I'll have yummy produce pics as well :) My dear brother is even coming with me to the market under I-83 with me!! I'll take pics while I'm there because it's so awesome.

Also my BFF Erin's birthday was on Tuesday so I'm going to try to drive up to PA to visit her and bring her some baked goodies ^_^

Check out Kristen's dry soup mixes! They sound delicious :) I'll be putting some of them together.

Oh and I have homework to do LOL!

Soooo much to do!!

Sunday, October 4, 2009

Found a NEW Farmer's Market

My BF's study partner showed me this wonderful market under I-83 in downtown Baltimore. Granted, I was a little skeptical about it since downtown is a little sketchy and funny smelling sometimes... but this place was fabulous. So many people were out supporting local businesses and farms! Not only was there fresh produce but also vendors cooking food in front of you. Everything smelled sooooo wonderful! Here is what I got:

peaches - $6
tomatoes - $5
sweet potatoes - $3
zucchini (6 yellow & 5 green) - $4
a french baguette (we already ate it with chicken soup) - $3

If anyone in the area wants to go, here's where it is (the middle section there under 83):

It's a little confusing to get there so if you're interested, message me and I'll try to explain where it is.

Tuesday, September 29, 2009

Farmer's Market

Inspired by Val, I started going to the farmer's market. It's a bit of a drive so I made it worth my while. Heres what I got.....

potatoes - $2
half pint of blueberries and half pint of raspberries - $3
a little over 7 pounds of tomatoes - $8
celery - $2
6 ears of corn - $2

I heart fresh produce :)

Friday, September 25, 2009

Apple Pie Filling for Canning

By popular demand.... here is the recipe I used for the apple pie filling I canned.
I used this recipe as a shell and added the spices to taste. Below are the ratios for the spices from the original recipe. Feel free to scale it for more quarts.... that's what I did :)

For 1 quart of apple pie filling:
  • 3-1/2 cups apples (cored, peeled and sliced)
  • 1 cup sugar
  • 1/4 cup corn starch
  • 1/2 tsp cinnamon
  • 1/4 tsp nutmeg
  • 1/4 tsp cloves
  • 1/4 tsp ginger
  • 1/4 tsp allspice
  • 1/2 cup cold water
  • 3/4 cup apple juice
  • 2 Tbsp lemon juice
  1. Cut apples and blanch them in boiling water for 5 minutes. This will stop the enzymes from turning the apples. Strain them into a colander but keep them warm
  2. Mix the sugar and cinnamon in a large pot with the apple juice and water. Stir constantly while cooking on medium heat until it begins to bubble.
  3. Mix the corn starch and lemon juice into the pot. Boil for 1 minute, stirring constantly until it begins to thicken.
  4. When filling the jars, layer liquid, apples, liquid, apples. Since the liquid is thick layering is the best way to get it nicely distributed.
  5. Pack the jars tightly with apples otherwise the bottom will be nothing but syrup. Leave at least 1/2 inch headspace.
  6. Process in a boiling water bath canner for 25 minutes.

Enjoy ^_^

Thursday, September 24, 2009

Apple Pie Jelly!!

I knew I was going to have a lot of apple peels and cores left over from making applesauce. Since I live in an apartment, it's a bit of a hassle to compost. I heard somewhere that the peels are very high in pectin so I :swagbucked: around and found Bethany's post about the same dilemma. Easy solution - APPLE JELLY! Since everyone seems curious about the process - here it is! Her post linked to this recipe which I followed loosely. Here's how I did it (you'll laugh once you see how easy this is ^_^):
  1. Save all your peels, cores and random bits of apples into a large stockpot.
  2. I used a 5 quart stainless steel stock pot and practically filled it.
  3. To the peels cores and bits, I added about 6-7 cups of water/apple juice (I approximated...)
  4. Simmer until everything is soft and mushy, stirring/mushing every so often so nothing scorches. I think I simmered it on a low/medium heat for an hour or so.
  5. After it cools a little, strain out all the large mushy chunks of apple bits.
  6. Pass the remaining liquid mixture through cheesecloth folded 4 times.
  7. I ended up with a little over 7 cups of liquid. Bring this to a simmering boil. Slowly dissolve 2 boxes of pectin as it's heating up.
  8. Using the 5/7 ratio of liquid to sugar from the original instructions, I added about 9 cups of sugar (all at once) to the liquid/pectin mix I had boiling. * I read somewhere that sometimes the jelly will taste flat because it's just peels and cores so I added cinnamon and nutmeg to taste.... BTW - IT TASTES LIKE APPLE PIE!! *
  9. Dissolve sugar well and test the viscosity of the jelly by dipping a cold spoon into the hot mixture and let it chill in the freezer. Keep the heat on until it reaches your desired level of jellyness on the chilled spoon.
  10. Then ladle into jars and process in a boiling water bath for 15-20 minutes.
I ended up with 14 half-pints.

Breakfast the morning after it was cooled - cream cheese and apple pie jelly on toast ^_^

It was around 5am when I took this pic and the lighting in my kitchen is sucky.....

....so here's the real color of the jelly with the bright flash LOL!

The jelly isn't as clear as I'd like it to be but since I added the cinnamon and nutmeg it's a little cloudy. BUT it is the BEST freakin' apple jelly I've ever had!!

If you have a ton of apples, you definitely need to make this stuff. It's the yumminess of an apple pie in jelly form ^_^

Wednesday, September 23, 2009

Coconut Shrimp

I LOVE coconut shrimp from Outback. I saw Lucy's version so I needed to try it out. I made some modifications and, even though they don't look like much, they tasted wonderful. The BF even gave them a 9 out of 10! The picture below is of the ones that were left on his plate. I snapped a pic as he was devouring them :)

Coconut Shrimp

24-30 raw shrimp, peeled, deveined and butterflied
1/4 cup cornstarch
1/4 tsp salt
1/4 tsp pepper
1/4 tsp cayenne pepper
2 eggs beaten
1-2 Tbsp lemon juice
2 cup sweetened shredded coconut

1. Pat the shrimp dry with a paper towel.
2. In a small bowl combine cornstarch, salt, pepper, and cayenne.
3. In a separate bowl, whisk the eggs and lemon juice.
4. In another bowl, place the coconut.
5. Coat the shrimp with the cornstarch and shake off any excess. Dip into the egg mixture and then press into the coconut to get full coverage.
6. Place shrimp in a single layer on a baking sheet covered with parchment paper. Bake at 375 for 6 minutes. Turn shrimp and continue baking for another 6 minutes, until the coconut is crispy and the shrimp is done.

Enjoy ^_^

Toasted Egg

I saw this cute breakfast idea here and had to try it. Here's how it turned out:

Instructions (as if you need them....)
  • butter both sides of bread
  • cut hole in center slightly larger than an egg yolk
  • place toast on pan on medium heat and wait for it to past a little
  • crack egg into the hole
  • wait till it firms up a bit and then turn carefully
  • cook until you think it's done

I like my eggs runny so I LOVED this!!
Too bad the BF doesn't like eggs.

Apple Sauce and Apple Pie Filling

OMG so many apples!! I stayed home from work to help my mom with something but that didn't happen so I worked on my pile of apples. Luckily I have my handy dandy apple peeler/corer/slicer to make the work easy. My first adventure into the world of canning was a success!! And if I wasn't sick for the first part of the day, it probably would have been better lol!

Anywho.... I made 3 quarts of apple pie filling and 8 quarts of cinnamon apple sauce. I saved all the peels and cores and am planning to make apple jelly out of it. Huzzah for being resourceful! Here are some pics of my work :)

We shall see how the apple jelly turns out. I have a full- time job that I have to get back to tomorrow.

Cheers!

Apple Picking in PA

On Sunday, my sister and I met my BFF and her husband and son at Maple Lawn Farms in New Park, PA. I hadn't been there in probably a decade or so. We ended up getting lost a few times but it's ok. Everywhere we stopped we supported the local economy. I came home with a few little squashes, blueberry honey, apple butter, pear butter and a delicious homemade chocolate peanut butter roll cake.... This was all before we made it to the orchard LOL! It was a gorgeous day and we had lots of fun. I picked 1.5 bushels of Gala, Golden Delicious and Johnny Red apples. From the little orchard store I bought another little squash and some local apple cider made on-site ^_^ All in all it was a great day. Here are some pretty pics :)

Me and my precious sister

Me and my BFF

My BFFs son! he's freakin adorable!!


Now I have to go make something with all the apples I picked!!

Saturday, September 19, 2009

Yard Sale Finds

I made out like a bandit at the latest yard sale! Here's what I got:

apple peeler/corer/slicer - new (yes I got another one!): $2
heavy duty metal mini-loaf pan - new: $2
pretty red basket for my freshly picked apples - 50 cents (was technically free but I gave the Boy Scouts 50 cents for it)
grater: $1.25
mortar and pestle - new: $3
3pc. stainless steel bowl set with lids (from Woolworths!!) - new: $2
crab pot/water bath canner with canning rack - $5
metal apple crusher/strainer thingy with wooden stick thing - $3 (someone please tell me what the actual name for this thing is lol!)
giant pink purse - new: $8 (waited till the end of the day - down from $24 ^_^)

Stuff I got for free from my BF's mom that was trying to get clean out the garage:
2 pasta cookers - free!
2 Penn State glasses - free!
pretty little tin with apples and pears on it - free!
2 canning jar type mugs - free!
5 quart stock pot - free!
pretty crackled glass candle holder (not pictured - forgot it in the car) - free!

Total Spent: $26.75 :)

I'm bushed..... resting up for apple picking tomorrow ^_^

Tuesday, September 15, 2009

Apple Picking this Sunday!!!

If anyone is in the MD/PA area, Maple Lawn Farms is a great place to pick! I used to go there when I was little. I just called them and they have a half bushel of apples for $10!! Applesauce, apple butter, apple pie filling, apple jelly..... here I come!! ^_^

Sunday, September 13, 2009

Chicken Pot Pie

Earlier this week I roasted a chicken just for this recipe. I ended up boiling the bones down with celery bits and carrot peels to give it the broth a good flavor. I had 4 jars of yummy concentrated chicken broth in my freezer. I used one of them for this recipe. I actually doubled this recipe so I could have one pot pie in the freezer for another dinner.

Chicken Pot Pie
1/2 c butter
1/3 c plain flour
1 tsp garlic powder
1/2 tsp salt
1/2 tsp pepper
1-1/2 c broth
2/3 c milk
2 c cooked chicken
10 oz. frozen mixed vegetables - I used fresh corn off the cob, peas and carrots.


Put your chicken in just enough water to cover it. Let it cook for about 4 hours on low to get all the flavor out. You can cook it faster, but this makes the broth richer. I add some pepper, salt and a celery stick and onion to it. Strain out and keep 1-1/2 c broth.

Melt butter, stir in flour, garlic, salt and pepper. Then stir in broth, milk and bouillon. Bring to a boil and then reduce heat and simmer about 2 minutes. Add chicken and vegetables. Roll dough out for a 9 inch pie crust. Pour in filling and cover with more pie crust dough. Seal edges and cut 2 slits in top to vent steam. Bake at 425 for 35 minutes.